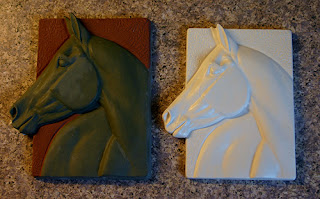
In the last moldmaking post, I had finished the plaster mold of my in-progress tile. I wanted the mold so that I could make a casting in earthenware, and do some of the fine detail work on the greenware rather than the sculpting clay. I find it difficult to get uniform curves across large areas (like a flank) in the plasteline. The irregularities just shift around. Working in the greenware allows me to sand these areas smooth. I can also carve and detail areas like the background leaf pattern, then soften the effect with a damp brush.
Oh, I should point out something I did wrong with this particular mold.
See the dark stains on the mold? Those happen when slip is poured into the mold before the plaster is completely dry. I was lucky that the mold was still usable after I did this! I hate to admit how many molds I have ruined this way. (Someday I will learn patience...)
But I was twice lucky this time, because the mold was still usable and the original pulled from the mold without any damage. Usually the original is a complete loss. (All the pictures of the original used here were taken after the mold was made.)
So I worked on the greenware. I softened the outine on the cheek area, and added the wrinkles and veins. I aso reworked the background. The original background was created by stamping the plastecine, but I decided I wanted to simplify the design. I also faded the pattern around the outline of the horse, which would allow glaze to pool there and help pop the horse out from the background. Once I had everything the way I wanted, I bisque fired the tile.
Here is the original with the fired bisque copy. As you can see, the fired tile is smaller due to shrinkage. He's also slightly shiny. That's because I used spray varnish to seal the bisque. I'm going to be adding the mane in plastecine, and it will be a lot easier to clean up any excess if the bisque is no longer porous. (He'll also have to sealed for the rubber mold that will be made later.)
So now he's ready for a mane. By waiting until this point to add the mane, I can experiment with the lines and flow without risking the underlying sculpture. I could also make a few rough castings, and try out different approaches. In this picture, my friend Sarah used a rough casting to give me a quick mane sculpting demo during my recent visit to Boise.
I'm afraid the next step for this guy - a rubber master mold - will have to wait, since I'm still debating about his hair-do. But as soon as that part is done, I'll take pictures and show how the rest of the process works.


2 comments:
That is a VERY cool Tile Leslie!! -Heather Abounader
Thank you! I have to finish him soon, before I get too used to looking at him bald. :)
Post a Comment